

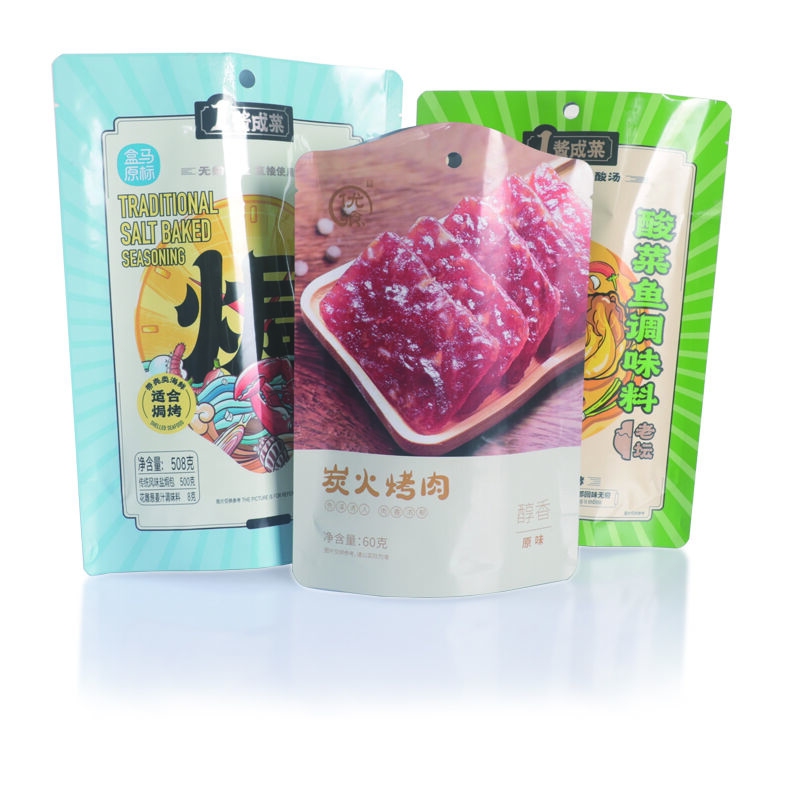
In-mold labeling is one of the most efficient and visually appealing decoration methods available in modern plastics manufacturing. By integrating the label directly into the molding cycle, manufacturers can produce containers, cups, and packaging components that carry permanent, high-resolution graphics without any secondary labeling process. However, like any advanced manufacturing technique, in-mold labeling comes with its own set of technical challenges that can disrupt production quality, increase scrap rates, and compromise the final product's performance. Understanding these problems — and knowing how to solve them — is essential for any operation that relies on this process.
This article addresses the most common defects encountered in in-mold labeling production — including warping, poor adhesion, label misalignment, static electricity issues, and surface defects — and provides practical, technically grounded solutions for each. Whether you are troubleshooting an existing line or setting up a new application, the insights here will help you optimize your process and achieve consistent, high-quality results. From polypropylene milk tea cups to industrial containers, the principles of defect-free in-mold labeling apply across the board.
Understanding Why In-Mold Labeling Defects Occur
The Nature of the In-Mold Labeling Process
In-mold labeling works by placing a pre-printed label into the open mold cavity before injection or blow molding begins. When molten plastic is injected, it bonds with the label substrate under heat and pressure, creating a single integrated unit. This tight integration is what makes in-mold labeling so durable and visually superior to post-mold labeling alternatives. However, the same conditions that create this bond — extreme heat, pressure, and rapid cooling — are also responsible for most of the defects that arise.
The label material, the plastic resin, the mold design, and the processing parameters must all be perfectly aligned for a defect-free outcome. A mismatch in any one of these variables creates the conditions for warping, delamination, bubbling, or poor adhesion. This means that troubleshooting in-mold labeling problems requires a systems-level perspective rather than fixing individual symptoms in isolation.
Understanding the root cause of each defect type is the first step toward solving it. Attempting to compensate for a process problem through material changes — or vice versa — often introduces new defects while masking the original issue. Structured diagnosis is always more effective than trial-and-error adjustments on the production floor.
The Role of Material Compatibility in Defect Prevention
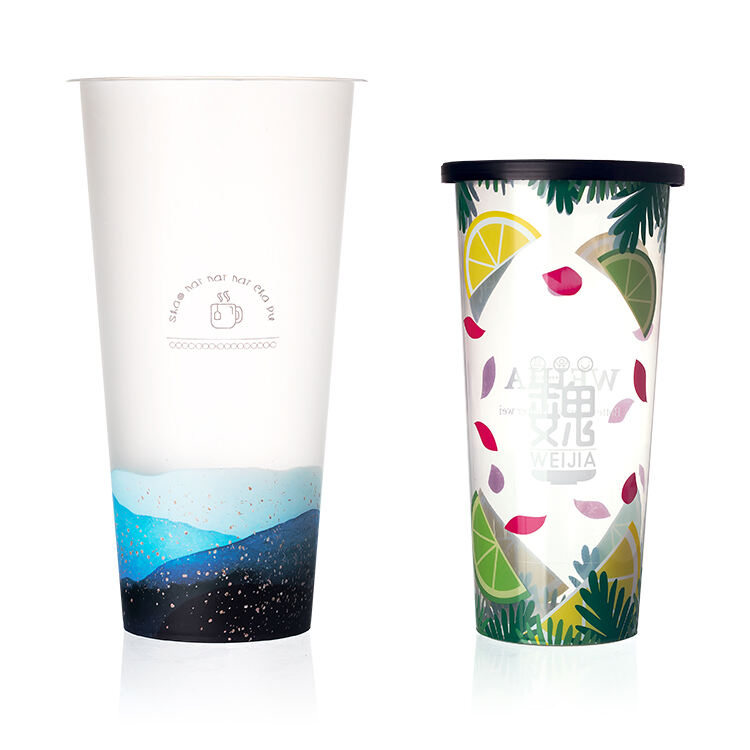
Material compatibility is one of the most critical and frequently overlooked factors in in-mold labeling quality. The label substrate must have a coefficient of thermal expansion that is closely matched to the base plastic resin. For polypropylene (PP) applications, which are extremely common in food packaging and beverage cups, this means using PP-based label films that expand and contract at a similar rate during the molding cycle.
When incompatible materials are used, the differential thermal movement between label and substrate creates internal stress during cooling. This stress manifests visually as warping, curling, or waviness at the edges of the labeled area. In severe cases, it can cause the label to partially lift from the surface, leading to poor adhesion zones that are invisible at first but become problematic during downstream handling, filling, or end-user use.
Selecting label films specifically engineered for in-mold labeling — with appropriate thickness, surface treatment, and barrier properties — eliminates a large proportion of material-related defects before the molding process even begins. This upfront investment in material specification pays dividends in reduced scrap and consistent cycle performance.
Solving Warping Problems in In-Mold Labeling
Causes of Warping and Dimensional Instability
Warping is one of the most visually obvious and commercially damaging defects in in-mold labeling. A warped container cannot be filled reliably, stacked properly, or presented attractively on retail shelves. It signals a fundamental imbalance in the molding system that must be addressed at the source rather than accepted as inevitable variation.
The primary cause of warping in in-mold labeling is uneven cooling across the part. When the labeled side of the part cools at a different rate than the unlabeled side, differential shrinkage pulls the part out of its intended geometry. This is particularly pronounced in thin-walled containers like cups and tubs, where the wall section is too thin to resist the resulting stress gradient on its own.
Secondary causes include imbalanced gate location, non-uniform melt flow filling the cavity asymmetrically, and inadequate venting that traps heat in localized zones. In multi-cavity molds, unbalanced runner systems can cause different cavities to fill at different rates and pressures, resulting in inconsistent warping patterns across parts from the same cycle.
Process and Tooling Adjustments to Eliminate Warping
Addressing warping in in-mold labeling begins with the mold cooling system. Conformal cooling channels positioned symmetrically around the cavity ensure that both the labeled and unlabeled surfaces cool at the same rate. Mold temperature controllers should be verified to confirm that actual coolant temperatures match setpoints and that flow rates are adequate to remove heat uniformly throughout the cycle.
On the process side, extending the cooling time before ejection is often the simplest corrective action. Parts ejected while still above their distortion temperature will warp under their own weight or under ejection forces. Increasing cooling time by even a few seconds can significantly reduce dimensional variation, particularly for thinner wall sections common in in-mold labeling applications like cups and lids.
Packing pressure and packing time also influence warping. Insufficient packing allows excessive shrinkage, while overpacking creates residual stress that also warps the part as it relaxes post-ejection. Optimizing packing parameters through systematic process development — rather than relying on historical settings — produces more stable and warp-resistant results across all in-mold labeling applications.
Addressing Poor Adhesion Between Label and Substrate
Why Labels Fail to Bond Properly
Poor adhesion is perhaps the most technically complex defect category in in-mold labeling. Unlike warping, which is immediately visible, adhesion failures may only manifest under stress conditions such as stretching, flexing, temperature cycling, or chemical exposure. A label that appears well-bonded in the production environment may delaminate in the field, creating serious quality and safety concerns for food and beverage packaging.
The adhesion mechanism in in-mold labeling depends on the molten plastic wetting and fusing with the back surface of the label film. For this to occur correctly, the melt temperature must be high enough to sufficiently activate the adhesion layer on the label, and injection pressure must be high enough to achieve intimate contact across the entire label surface without air entrapment.
If melt temperature is too low, the polymer chains do not have sufficient mobility to intermingle with the label's adhesive layer, resulting in a weak bond. If injection velocity is too high or too low, the melt front may fold back on itself or fail to fill behind the label evenly, leaving unbonded zones that compromise the structural integrity of the finished part.
Practical Solutions for Improving Label Adhesion
The most reliable way to improve adhesion in in-mold labeling is to verify that the label's back-surface treatment is appropriate for the specific resin being processed. PP labels used with PP resin should have a micro-perforated or heat-activatable coating that allows the melt to form a mechanical and chemical bond simultaneously. Labels designed for other substrates should not be assumed to perform equivalently.
Process parameter optimization is equally important. Increasing melt temperature within the resin supplier's recommended range improves melt flow and wetting. Slowing the injection velocity slightly during cavity fill — particularly over the label area — reduces the risk of air entrapment and gives the polymer more time to conform to the label surface. These adjustments should be made in small increments and validated with adhesion testing before committing to production changes.
Mold surface temperature also plays a role in adhesion quality. A mold surface that is too cold prematurely solidifies the melt before it has fully bonded with the label. Slightly raising mold temperature on the label-side cavity surface can improve bond strength without negatively affecting cycle time, provided the overall cooling balance is maintained. For applications like in-mold labeling of PP milk tea cups, achieving consistent adhesion is critical because these containers must withstand both thermal and mechanical stress during filling and consumer use.
Correcting Label Misalignment and Static Electricity Problems
Causes and Consequences of Label Misalignment
Label misalignment is a defect that directly impacts visual quality and brand perception. In in-mold labeling, labels must be positioned precisely within the mold cavity before each shot. Even small deviations — a fraction of a millimeter — can result in visible registration errors that are unacceptable in consumer packaging applications. For products with complex graphics or text close to the label edge, misalignment is immediately obvious to the end consumer.
The most common cause of misalignment is inconsistent label placement by the in-mold labeling robot or pick-and-place system. Worn gripper tooling, inaccurate servo positioning, or vibration in the robotic arm can all cause placement errors that accumulate over time. Regular calibration and preventive maintenance of the automation system are essential for maintaining alignment precision in high-volume in-mold labeling operations.
Label curling before placement is another frequent source of misalignment. Labels that have absorbed moisture or been stored improperly may not lie flat against the cavity surface, causing them to shift when the mold closes. Controlling label storage conditions — temperature, humidity, and time out of packaging — reduces this variability significantly.
Managing Static Electricity for Reliable Label Placement
Static electricity is both a friend and a foe in in-mold labeling. Controlled static charge is deliberately applied to labels to help them cling to the mold cavity surface during placement and before the mold closes. Without this electrostatic retention, labels would fall or shift under gravity or air turbulence. However, uncontrolled static causes labels to attract dust particles, cling to each other in the magazine, or fail to release cleanly from the gripper system.
The solution lies in precise static management. Static ionizers or charge bars should be calibrated to apply the correct level of charge for the label material and mold cavity geometry. Too little charge and the label fails to hold position; too much charge and it attracts contaminants or resists proper release. Regular cleaning of the mold cavity surface is also important, as dust accumulation under the label creates both adhesion and print quality issues.
Grounding the robot arm and all associated tooling prevents unintended charge buildup that could interfere with label placement. In humid environments, where ambient static levels fluctuate, active ionization systems are more reliable than passive approaches. Investing in reliable static management equipment is one of the highest-return improvements available for in-mold labeling operations struggling with placement consistency.
Resolving Surface Defects: Bubbles, Blisters, and Print Distortion
Identifying the Root Causes of Surface Defects
Surface defects in in-mold labeling — particularly bubbles, blisters, and print distortion — are among the most frustrating quality issues because they are often intermittent and difficult to reproduce consistently for diagnosis. Bubbles and blisters appear when gas or moisture is trapped between the label and the mold cavity wall, preventing full contact and creating voids in the bond zone. These defects reduce adhesion strength and create visually obvious irregularities in the printed graphic.
Moisture is a particularly common culprit. PP labels stored in high-humidity environments can absorb surface moisture that vaporizes under the heat of the molding cycle, creating steam pockets between the label and cavity. Similarly, resin that has not been properly dried before processing may release moisture vapor into the melt, which can migrate to the label interface and cause blistering.
Print distortion occurs when the label stretches non-uniformly during the molding process. High injection velocities can shear the label across the cavity surface, displacing it from its initial position and distorting any fine-line graphics or text. Mold designs that create turbulent or asymmetric flow patterns behind the label are particularly prone to causing this type of defect in in-mold labeling applications.
Practical Approaches to Eliminate Bubbles and Print Distortion
Eliminating bubbles and blisters requires attention to both material preparation and process conditions. Labels should be stored in sealed packaging until immediately before use and conditioned to the production environment temperature before loading into the magazine. Resin should be dried according to the material supplier's specifications, with moisture content verified periodically using a moisture analyzer rather than assumed from drying time alone.
Mold venting plays a critical role in bubble prevention for in-mold labeling. Adequate venting at the label periphery allows displaced air to escape as the melt fills behind the label. Insufficient venting traps air at the label edges, creating the characteristic blister pattern seen in many production defects. Venting should be checked and cleaned regularly, as polymer residue can block vent channels over time.
For print distortion, the solution typically involves optimizing injection velocity profiles using multi-stage fill control. Slowing the injection velocity as the melt front reaches and flows over the label area reduces shear forces that can displace the label. Where mold flow analysis software is available, it can be used to predict flow patterns and identify cavity or gate design changes that would produce more uniform fill behind the label, protecting the graphic integrity that makes in-mold labeling so commercially valuable.
FAQ
What causes warping in in-mold labeling, and how can it be fixed quickly?
Warping in in-mold labeling is most commonly caused by uneven cooling between the labeled and unlabeled sides of the part. The fastest corrective actions are increasing cooling time before ejection, checking mold temperature balance, and verifying that the label substrate has a thermal expansion coefficient compatible with the base resin. For persistent warping, conformal cooling channel redesign may be necessary.
How do I improve adhesion between the label and the plastic in in-mold labeling applications?
Adhesion improvement in in-mold labeling requires a combination of correct label selection, optimized melt temperature, appropriate injection velocity, and adequate mold surface temperature on the label side. Ensure the label's back surface is specifically treated for in-mold labeling with the resin you are using, and validate adhesion with peel testing before finalizing process parameters.
Why do bubbles appear under labels in in-mold labeling, and how are they prevented?
Bubbles under in-mold labeling labels are caused by trapped air or moisture vaporization at the label-cavity interface. Prevention involves proper label conditioning and storage, thorough resin drying, adequate mold venting at the label periphery, and controlled injection velocity to avoid air entrapment. Regular maintenance of mold vent channels is also essential.
Can in-mold labeling be used on thin-walled PP cups without quality problems?
Yes, in-mold labeling is well-suited for thin-walled PP cups and is widely used in beverage packaging including milk tea cups. Achieving consistent quality requires careful attention to mold cooling balance, label material selection, and process parameter optimization. When these factors are properly managed, in-mold labeling delivers excellent adhesion, scratch resistance, and visual quality even on very thin wall sections.
Table of Contents
- Understanding Why In-Mold Labeling Defects Occur
- Solving Warping Problems in In-Mold Labeling
- Addressing Poor Adhesion Between Label and Substrate
- Correcting Label Misalignment and Static Electricity Problems
- Resolving Surface Defects: Bubbles, Blisters, and Print Distortion
-
FAQ
- What causes warping in in-mold labeling, and how can it be fixed quickly?
- How do I improve adhesion between the label and the plastic in in-mold labeling applications?
- Why do bubbles appear under labels in in-mold labeling, and how are they prevented?
- Can in-mold labeling be used on thin-walled PP cups without quality problems?